Bonaok Microphone Manual: A Comprehensive Guide
Welcome! This manual details the Bonaok Bluetooth karaoke microphone‚ offering guidance on setup‚ features like voice changers‚ and troubleshooting. Enjoy enhanced audio experiences!
Welcome to the world of portable karaoke! The Bonaok microphone is designed to transform any space into a personal concert hall. This wireless Bluetooth microphone combines high-fidelity audio with user-friendly features‚ making it perfect for singers of all levels – from seasoned performers to shower-time enthusiasts.
Unlike traditional karaoke setups‚ the Bonaok offers complete freedom of movement‚ eliminating the need for cumbersome wires. Its built-in speaker delivers clear‚ resonant sound‚ while advanced noise reduction technology ensures your vocals shine through. The microphone isn’t just for singing; it’s also ideal for recording voiceovers‚ podcasts‚ or simply amplifying your voice during presentations.
This guide will walk you through every aspect of your Bonaok microphone‚ from unboxing and initial setup to mastering its advanced features like voice changers and EQ adjustments. Discover how to connect seamlessly to your smartphone‚ PC‚ or laptop‚ and unlock a world of musical possibilities. Prepare to experience karaoke like never before – convenient‚ captivating‚ and completely customizable!
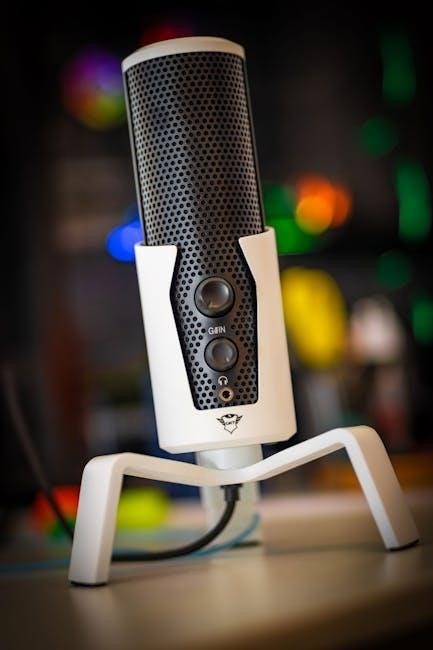
Unboxing and Components
Congratulations on your new Bonaok microphone! Upon opening the box‚ carefully verify that all components are present and undamaged. Your Bonaok package should include the microphone itself‚ a micro-USB charging cable‚ and this comprehensive user manual. Some models may also include a 3.5mm audio cable for wired connections‚ though Bluetooth is the primary connectivity method.
Inspect the microphone for any visible signs of shipping damage. The sleek‚ portable design features a durable metal casing and a comfortable‚ polished handle. The charging cable is used to power the internal battery‚ providing hours of wireless singing enjoyment. The user manual contains detailed instructions on all features and troubleshooting steps.
Retain the original packaging for potential warranty claims or future transport. If any components are missing or damaged‚ immediately contact customer support. Familiarize yourself with the location of the power button‚ volume controls‚ and input/output ports before proceeding. Proper component verification ensures a smooth and enjoyable user experience from the start.
Microphone Overview: Buttons and Ports
Let’s explore the Bonaok microphone’s controls! The top panel features the power button‚ used for turning the device on and off. Adjacent to it are the volume control buttons – typically marked with ‘+’ and ‘-‘ symbols – for adjusting the microphone’s output level. A central button often controls echo effects and voice changer activation‚ cycling through various pre-set options.
On the bottom of the microphone‚ you’ll find the Micro-USB charging port‚ used with the included cable to recharge the internal battery. Some models include a 3.5mm audio input port‚ allowing for wired connections to external devices like smartphones or MP3 players. A small indicator light displays power status and Bluetooth connectivity.
The built-in speaker is located on the microphone’s body‚ providing direct audio output. Understanding the function of each button and port is crucial for maximizing your Bonaok experience. Refer to the diagrams in this manual for precise locations and detailed explanations of each control.
Powering On/Off and Charging
Getting started is simple! To power on your Bonaok microphone‚ press and hold the power button – usually located on the top panel – for approximately 2-3 seconds. A visual indicator‚ such as a flashing light‚ will confirm activation. To power off‚ repeat this process; holding the button until the device shuts down.
Charging the microphone is essential for portable use. Connect the included Micro-USB cable to the charging port (typically found on the bottom of the device) and a suitable USB power source‚ like a computer or wall adapter. A red indicator light usually signifies charging is in progress‚ turning to green or off when fully charged.
Full charging typically takes around 2-3 hours‚ providing several hours of continuous use. Avoid using the microphone while it’s charging to prevent potential damage. Regularly charging ensures optimal performance and extends the lifespan of your Bonaok microphone’s battery.
Bluetooth Pairing Instructions
Connecting wirelessly is easy! First‚ ensure your Bonaok microphone is powered on. Activate Bluetooth mode by pressing the designated Bluetooth button – often indicated by a Bluetooth symbol. The microphone will enter pairing mode‚ usually signaled by a flashing blue light.
On your smartphone‚ tablet‚ or computer‚ navigate to the Bluetooth settings menu. Scan for available devices. You should see “Bonaok” or a similar identifier appear in the list. Select it to initiate the pairing process.
If prompted‚ enter the pairing code “0000” (four zeros). Once successfully paired‚ the blue light on the microphone will typically become solid‚ indicating a stable connection. The microphone is now ready to transmit audio wirelessly. Remember to keep the microphone within a reasonable Bluetooth range (approximately 33 feet) for optimal performance. Re-pairing may be necessary if the device is moved too far away or the connection is interrupted.
Connecting to Smartphones (iOS & Android)
Seamless smartphone integration! After successful Bluetooth pairing (see previous section)‚ open your preferred karaoke or music app on your iOS or Android device. Ensure the app has permission to access your microphone. Select the Bonaok microphone as the audio input device within the app’s settings.
For iOS‚ navigate to Settings > Bluetooth and confirm the Bonaok microphone is connected. For Android‚ go to Settings > Connections > Bluetooth and verify the connection. Some Android devices may require additional permissions within the app itself.
Once selected‚ your voice will be transmitted through the microphone. Experiment with different karaoke apps to find one that suits your preferences. The Bonaok microphone’s built-in speaker allows for immediate playback‚ or you can connect headphones for a more private listening experience. Enjoy singing along to your favorite tunes with enhanced sound quality and portable convenience!
Connecting to PCs and Laptops
Expand your karaoke fun to your computer! To connect your Bonaok microphone to a PC or laptop‚ first ensure Bluetooth is enabled on your computer. Navigate to your Bluetooth settings (usually found in the system tray or settings menu) and initiate a device search. Your Bonaok microphone should appear in the list of available devices.
Select the microphone to initiate the pairing process. You may be prompted for a pairing code; if so‚ enter “0000” or consult the troubleshooting section if this doesn’t work. Once paired‚ your computer will recognize the Bonaok microphone as an audio input device.
Next‚ select the Bonaok microphone as the default microphone in your computer’s sound settings. This ensures that applications like Zoom‚ Skype‚ or karaoke software will utilize the microphone for audio input. Test the connection by recording a short audio clip. Enjoy versatile usage for online meetings‚ streaming‚ and karaoke sessions!
Troubleshooting Bluetooth Connection Issues
Experiencing connection difficulties? First‚ verify Bluetooth is enabled on both your device and the Bonaok microphone. Ensure the microphone is sufficiently charged‚ as low battery can interfere with pairing. If pairing fails‚ try restarting both devices – a simple reboot often resolves temporary glitches.
If the microphone appears in the Bluetooth list but won’t connect‚ “forget” or “unpair” it from your device’s Bluetooth settings‚ then re-initiate the pairing process. Confirm no other devices are actively connected to the microphone‚ as it can only maintain one connection at a time. Interference from other wireless devices can also cause issues; move away from potential sources.
For persistent problems‚ try resetting the microphone (consult the ‘Powering On/Off and Charging’ section for reset instructions). If issues remain‚ ensure your device’s Bluetooth drivers are up-to-date. Finally‚ check for firmware updates for your Bonaok microphone via the manufacturer’s website.
Understanding the Sound Effects & Voice Changers
Unleash your inner performer! The Bonaok microphone boasts a range of built-in sound effects and voice changers‚ accessible via the microphone’s control buttons. These features enhance your karaoke experience‚ allowing you to experiment with different vocal styles and create unique performances.
Explore options like echo‚ reverb‚ and various voice modifications – from high-pitched squeaks to deep‚ resonant tones. The EQ chip and DSP technology power these effects‚ delivering high-quality sound processing. Cycle through the available effects by pressing the designated ‘Sound Effect’ or ‘Voice Change’ button on the microphone.
The intensity of some effects may be adjustable; refer to the ‘Adjusting Volume and Echo’ section for details. Experiment with different combinations to discover your favorite settings. Remember that the specific effects available may vary slightly depending on your microphone model. Have fun and get creative!
Adjusting Volume and Echo

Fine-tune your sound! The Bonaok microphone provides dedicated controls for adjusting both volume and echo levels. Volume control is typically managed via the ‘+’ and ‘-’ buttons on the microphone itself‚ allowing you to increase or decrease the overall output volume. Be mindful of your surroundings and avoid excessively loud volumes to protect your hearing.
Echo‚ also known as reverb‚ adds depth and spaciousness to your voice. The echo level is usually adjusted using a separate control‚ often a dedicated button or a combination of button presses. Experiment with different echo settings to find the perfect balance for your singing style and the acoustics of your environment.
Remember that the echo effect interacts with the built-in speaker and any connected external speakers. Adjust both volume and echo in tandem to achieve optimal sound quality. Refer to the ‘Utilizing the Built-in Speaker’ section for further guidance.
Utilizing the Built-in Speaker
Enjoy instant karaoke! The Bonaok microphone features a powerful built-in speaker‚ allowing you to use it as a standalone karaoke machine without needing external speakers. The speaker’s volume is controlled using the microphone’s volume buttons‚ ensuring convenient adjustment. While the built-in speaker is convenient‚ its sound quality and volume are limited by its size.
For a more immersive experience‚ consider connecting the microphone to external speakers via Bluetooth or an audio cable (if supported by your model). This will significantly enhance the sound quality and projection‚ especially in larger spaces. When using external speakers‚ adjust the volume on both the microphone and the external speakers to achieve the desired sound level.
Remember to consider the acoustics of your room. Hard surfaces can cause echoes‚ while soft furnishings can absorb sound. Experiment with microphone placement and speaker positioning to optimize the sound quality. Refer to the ‘Optimizing Microphone Placement’ section for more details.
Customizing Sound with the EQ Chip & DSP Technology
Unlock superior audio! The Bonaok microphone incorporates an advanced EQ (Equalization) chip and DSP (Digital Signal Processing) technology‚ enabling extensive sound customization. These features allow you to tailor the audio output to your preferences and singing style‚ enhancing vocal clarity and overall sound quality.
The EQ chip lets you adjust specific frequency ranges – bass‚ mid-tones‚ and treble – to fine-tune the sound. Experiment with boosting or reducing these frequencies to achieve a balanced and pleasing sound. DSP technology powers the voice changers and sound effects‚ adding creative flair to your performances. Explore the various pre-set effects or create your own unique combinations.
Access these features through the microphone’s controls or a companion app (if available for your model). Refer to the ‘Understanding the Sound Effects & Voice Changers’ section for detailed instructions on utilizing these capabilities. Remember that subtle adjustments often yield the best results.
Noise Reduction Features Explained
Experience clearer vocals! The Bonaok microphone is engineered with robust noise reduction capabilities to minimize unwanted background sounds‚ ensuring a pristine audio experience. It utilizes a three-layer filter head system‚ effectively reducing noise generated during singing or recording. This multi-layered approach targets different frequency ranges of noise‚ providing comprehensive suppression.
The first layer filters out high-frequency disturbances‚ like hissing or static. The second layer tackles mid-range noises‚ such as room echo or ambient chatter. Finally‚ the third layer focuses on low-frequency rumble and vibrations. This combined filtration process significantly improves the clarity of your voice‚ even in less-than-ideal recording environments.
While effective‚ these features work best when used in conjunction with proper microphone placement and a relatively quiet environment. Avoid placing the microphone near sources of loud noise. Experiment with different settings to find the optimal balance between noise reduction and natural sound reproduction.
Optimizing Microphone Placement for Best Sound
Achieve professional-quality audio! Proper microphone placement is crucial for maximizing sound clarity and minimizing unwanted noise. Generally‚ position the Bonaok microphone 6-12 inches from your mouth. This distance allows for a balanced capture of your voice without excessive breathiness or popping sounds.
Avoid pointing the microphone directly at your mouth‚ as this can lead to distortion. Instead‚ angle it slightly to the side‚ aiming towards your cheek. This technique reduces plosives – those harsh “p” and “b” sounds. Ensure the microphone is positioned at roughly mouth level to capture your voice consistently.
Consider the surrounding environment. Minimize background noise by recording in a quiet room‚ away from fans‚ air conditioners‚ or other sound sources. Soft surfaces like carpets and curtains can help absorb echoes and improve sound quality. Experiment with different positions to find what works best for your voice and recording space. A little adjustment can make a significant difference!
Care and Maintenance of Your Bonaok Microphone
Keep your Bonaok microphone in top condition! Regular care ensures longevity and optimal performance. After each use‚ gently wipe down the microphone’s exterior with a soft‚ dry cloth to remove dust and fingerprints. Avoid using abrasive cleaners or solvents‚ as these can damage the finish.
The microphone’s filter head‚ crucial for noise reduction‚ should be inspected periodically. Carefully remove any accumulated dust or debris with a small‚ soft brush. Do not immerse the microphone in water or any liquid. Protect it from extreme temperatures and humidity‚ as these can affect its internal components.
When storing the microphone‚ keep it in a clean‚ dry place‚ ideally in its original packaging or a protective case. Avoid dropping or subjecting the microphone to physical shock. Proper handling and storage will help maintain its functionality and extend its lifespan‚ ensuring years of karaoke enjoyment!
Troubleshooting Common Audio Problems
Experiencing audio issues? Let’s resolve them! If you encounter no sound‚ first ensure the microphone is powered on and properly paired via Bluetooth. Check the volume levels on both the microphone and your connected device (smartphone‚ PC‚ etc.). Confirm the microphone is selected as the input device in your device’s settings.
For distorted sound‚ reduce the volume or echo levels. Excessive volume can cause clipping. If experiencing feedback‚ try adjusting the microphone’s position or reducing the volume. Ensure the microphone is not directly facing the speaker. Three-layer noise reduction helps‚ but placement matters!
If Bluetooth connection is unstable‚ move closer to your device and remove any potential sources of interference. Restarting both the microphone and your device can often resolve connectivity issues. If problems persist‚ consult the FAQ section or contact customer support for further assistance.
Disco Light Functionality and Control
Enhance your karaoke sessions with the built-in disco lights! The Bonaok microphone features dynamic lighting effects designed to create a vibrant party atmosphere. These lights automatically synchronize with the music‚ adding a visual element to your performance.
To control the disco lights‚ locate the dedicated light control button on the microphone. A single press typically cycles through different lighting modes – including solid colors‚ flashing patterns‚ and music-reactive modes. Some models offer adjustable brightness levels. Experiment to find the setting that best suits your preference and the ambiance of your event.
If the lights aren’t functioning‚ ensure the microphone is sufficiently charged. Low battery power can sometimes affect the light functionality. If the issue persists‚ consult the troubleshooting section of this manual or contact customer support. Enjoy the show!
Portable Design and Handling
The Bonaok microphone is engineered for portability‚ making it ideal for karaoke on the go! Its lightweight construction and compact size allow for easy transport to parties‚ gatherings‚ or travel destinations. The microphone boasts a portable and bluntly polished handle‚ ensuring a comfortable and secure grip during use.
When handling the microphone‚ avoid dropping it or subjecting it to significant impacts‚ as this could damage the internal components. Keep the microphone away from extreme temperatures and humidity. For optimal longevity‚ store it in a protective case when not in use.
The microphone’s durable build quality ensures it can withstand reasonable handling‚ but careful treatment will maximize its lifespan. Remember to securely hold the microphone during performances to prevent accidental drops and maintain a consistent audio experience. Enjoy the freedom of portable karaoke!
Safety Precautions
To ensure safe operation of your Bonaok microphone‚ please adhere to the following precautions. Avoid exposing the device to excessive moisture or liquids; do not use it in rainy conditions or near water sources. Do not disassemble or attempt to repair the microphone yourself‚ as this will void the warranty and could pose a safety hazard.
Keep the microphone away from extreme heat‚ such as direct sunlight or open flames. Prolonged exposure to high temperatures can damage the internal components. When charging the device‚ use only the provided USB cable and a compatible power adapter. Do not overcharge the microphone‚ as this can reduce battery life and potentially cause damage.
Always handle the microphone with care to avoid dropping it or subjecting it to impacts. Listen at a comfortable volume level to prevent hearing damage. Discontinue use if you notice any unusual smells‚ smoke‚ or malfunctions.
Warranty Information and Support
Bonaok microphones are covered by a standard one-year limited warranty against defects in materials and workmanship from the date of original purchase. This warranty does not cover damage resulting from misuse‚ accidents‚ unauthorized modifications‚ or normal wear and tear. Proof of purchase is required for all warranty claims.
To initiate a warranty claim‚ please contact Bonaok customer support with details of the issue and your purchase information. Our support team will guide you through the process and determine if your claim is eligible. We strive to provide prompt and efficient assistance to resolve any issues you may encounter.
For additional support‚ including FAQs‚ troubleshooting tips‚ and user manuals‚ please visit the official Bonaok website. You can also reach our customer support team via email or phone. We are committed to ensuring your satisfaction with your Bonaok microphone.
Frequently Asked Questions (FAQ)
Q: My microphone won’t connect via Bluetooth. Ensure Bluetooth is enabled on your device and the microphone is in pairing mode. Restart both devices and try again. Check for interference from other wireless devices.
Q: How do I reset the microphone? A small reset pinhole is located on the microphone base. Use a paperclip to gently press the reset button for five seconds.
Q: Can I use this microphone with a TV? Compatibility varies. If your TV has Bluetooth‚ you may be able to connect. Otherwise‚ a separate Bluetooth transmitter may be required.
Q: What does the EQ chip and DSP technology do? These technologies enhance sound quality‚ providing customizable equalization and digital signal processing for a richer audio experience.
Q: How do I charge the microphone? Use the included USB cable to connect the microphone to a power source. A full charge typically takes 2-3 hours.
Where to Find Additional Resources
Official Bonaok Website: Visit the official Bonaok website for the most up-to-date information‚ including downloadable manuals‚ firmware updates‚ and detailed product specifications. You’ll find comprehensive support resources there.
Online Retailer Support: Check the retailer where you purchased the microphone (e.g.‚ Amazon‚ eBay). They often have dedicated support sections with FAQs and troubleshooting guides specific to the product listing.
YouTube Tutorials: Numerous user-created video tutorials on YouTube demonstrate setup‚ features‚ and troubleshooting tips for Bonaok microphones. Search for “Bonaok microphone tutorial” to find helpful visual guides.
Online Forums & Communities: Engage with other Bonaok microphone users in online forums and communities. Share experiences‚ ask questions‚ and find solutions to common issues. Reddit and dedicated karaoke forums are good starting points.
Bonaok Customer Service: For direct assistance‚ contact Bonaok customer service via their website or email. Be prepared to provide your microphone model and purchase details.