
Masterbuilt Turkey Fryer Instruction Manual: A Comprehensive Guide
Welcome! This manual provides detailed instructions for safely and effectively using your Masterbuilt electric turkey fryer, ensuring a delicious and memorable holiday feast.
Explore essential safety precautions, component identification, preparation steps, and frying techniques, alongside troubleshooting tips for optimal performance and enjoyment.
Refer to the provided resources – Reddit discussions, Internet Archive manuals, and Masterbuilt’s official website – for supplementary information and helpful recipes.
Understanding Your Masterbuilt Turkey Fryer
Congratulations on choosing a Masterbuilt electric turkey fryer! This appliance offers a convenient and safer alternative to traditional oil-based turkey frying methods. Unlike open-flame fryers, the Masterbuilt utilizes a controlled electric heating element, minimizing risks associated with hot oil splatters and potential fire hazards.
Before your first use, familiarize yourself with the fryer’s unique features. It’s designed to accommodate turkeys up to 20lbs, though displacement calculations are crucial for accurate oil levels – differing from frying other items like mozzarella sticks. The unit’s design, as noted in online discussions, deviates from traditional tall pots, necessitating adherence to the provided instructions.
Masterbuilt provides comprehensive resources, including user manuals available via the Internet Archive and supplementary videos on their website (www.masterbuilt.com). These resources detail the fryer’s operation, safety guidelines, and delicious recipe ideas, ensuring a successful and enjoyable frying experience. Proper understanding is key to safe operation.
Safety First: Essential Precautions
Prioritize safety when operating your Masterbuilt turkey fryer. Always use the fryer outdoors, on a level, non-combustible surface, away from structures and flammable materials. Never operate the fryer in enclosed spaces like garages or porches.
Ensure the turkey is completely thawed and dry, both inside and out, using paper towels as recommended in the operation manual. Water contact with hot oil can cause dangerous splattering. Never leave the fryer unattended during operation. Keep children and pets away from the hot appliance.
Exercise extreme caution when handling hot oil. Use appropriate protective gear, such as oven mitts or long sleeves. Be aware of potential temperature fluctuations and prevent oil overflow by accurately calculating oil volume using the displacement method. Refer to the manual (available on ManualsLib) for detailed safety instructions and heed all warnings.
Component Identification
Your Masterbuilt electric turkey fryer consists of several key components. The fryer pot houses the cooking oil and features integrated heating elements. The fryer basket, with its attached lifting hook, safely lowers and raises the turkey into and out of the hot oil – crucial for preventing spills and burns.
The control panel allows for precise temperature adjustments and timer settings. Familiarize yourself with the power button, temperature controls, and any indicator lights. A built-in thermometer accurately monitors the oil temperature, ensuring optimal frying conditions.
The power cord connects the fryer to a grounded electrical outlet. Always inspect the cord for damage before each use. Refer to the assembly and use manual (found on ManualsLib) for a detailed diagram identifying each part and its function.
Fryer Basket & Lifting Hook
The fryer basket is a critical component, designed to securely hold the turkey during submersion in hot oil. Constructed from durable, heat-resistant material, it prevents direct contact with the heating element and facilitates safe handling. Ensure the basket is clean and free of debris before each use.
The lifting hook attaches firmly to the basket, enabling controlled lowering and raising of the turkey. This minimizes splashing and prevents accidental drops. Always use the lifting hook; never attempt to handle the hot basket directly.
Inspect the hook for any signs of wear or damage before each frying session. A secure connection between the hook and basket is paramount for safety. Proper use, as demonstrated in online videos referenced on Reddit, is essential for a successful and safe frying experience.
Control Panel Overview
The Masterbuilt turkey fryer’s control panel is intuitively designed for precise temperature management. It typically features a power button, temperature adjustment controls (often dial or digital buttons), and indicator lights to signal heating and temperature maintenance.
Familiarize yourself with the temperature range settings, ensuring they align with recommended frying temperatures for poultry. The panel allows for accurate setting and monitoring of the oil’s heat, crucial for achieving a perfectly cooked turkey.
Refer to the user manual (available via the Internet Archive) for specific details regarding your model’s control panel functions. Understanding these controls, and practicing before your first fry, will contribute to a safer and more enjoyable cooking process.

Thermometer & Power Cord
The thermometer is a critical component, providing real-time oil temperature readings for safe and effective frying. Ensure it’s properly inserted into the oil, avoiding contact with the fryer’s heating element or the turkey itself, for accurate measurements.
Regularly check the thermometer’s calibration; inaccuracies can lead to undercooked or overcooked poultry. The power cord should be inspected before each use for any signs of damage – cracks, fraying, or exposed wires – which could pose an electrical hazard.
Always use a grounded outlet and avoid extension cords if possible. Never immerse the power cord or fryer base in water. Proper care of these components ensures safe operation and extends the fryer’s lifespan.
Preparing for Your First Fry
Successful turkey frying begins with meticulous preparation. Choosing the right turkey size is paramount; the Masterbuilt fryer is designed for birds up to 20lbs, but optimal results depend on accurate oil volume.
Calculating oil volume requires the “displacement method” – placing the turkey in the fryer basket and filling with water to determine the necessary oil level. Remember to remove the turkey before heating the oil! Proper turkey thawing is non-negotiable; ensure the turkey is completely thawed, as frozen portions will cause dangerous oil splatter.
A fully thawed turkey cooks evenly and safely. Thorough preparation minimizes risks and maximizes flavor, setting the stage for a perfectly fried turkey.
Choosing the Right Turkey Size (Up to 20lbs)
Your Masterbuilt turkey fryer is optimally designed for turkeys weighing up to 20 pounds. Exceeding this weight limit can compromise safety and cooking efficiency, potentially leading to uneven cooking or even hazardous oil overflow. While the fryer claims a 20lb capacity, remember displacement varies.
A 20lb turkey isn’t equivalent to 20lbs of denser items like mozzarella sticks or wings. Consider a slightly smaller bird, around 18lbs, to provide a safety margin and ensure complete submersion in the oil. An empty turkey cavity also affects displacement calculations. Prioritize safety and manageable size for a successful frying experience.
Calculating Oil Volume – The Displacement Method
Accurately determining the required oil volume is crucial for safe and effective turkey frying. The displacement method is highly recommended, especially with the Masterbuilt XL 10 model, as it differs from traditional pot setups. Place the fully thawed turkey into the fryer basket and lower it into the empty fryer pot.
Fill the pot with water until the turkey is completely submerged. Remove the turkey, and carefully measure the water remaining in the pot. This measurement represents the volume of oil needed. Remember to thoroughly dry the pot before adding oil! Online resources and user discussions highlight that a 20lb turkey’s displacement isn’t standard.
Proper Turkey Thawing Procedures
Thoroughly thawing your turkey is paramount for safety and even cooking. The recommended method is refrigerator thawing, allowing approximately 24 hours for every 4-5 pounds of turkey. Ensure the turkey remains in its original packaging and is placed on a tray to catch any drips. Never thaw at room temperature, as this encourages bacterial growth.

Alternatively, you can thaw the turkey in cold water, changing the water every 30 minutes. Calculate approximately 30 minutes of thawing time per pound. A fully thawed turkey will have no ice crystals remaining in the cavity. Dry the inside cavities using paper towels, as suggested in operation manuals, before proceeding with preparation.
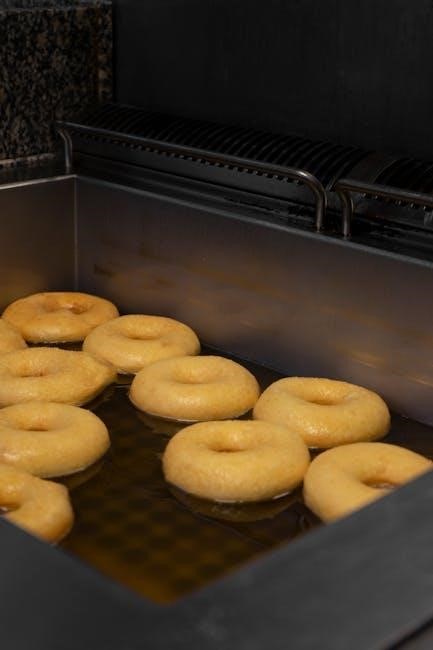
The Frying Process: Step-by-Step
Begin by setting up the fryer in a well-ventilated outdoor area, away from structures and flammable materials. Carefully add the appropriate amount of frying oil, determined using the displacement method, ensuring the turkey will be fully submerged. Heat the oil to the recommended temperature, typically around 350°F (177°C), monitoring with the built-in thermometer.

Before lowering the turkey, ensure it’s completely thawed and thoroughly dried, both inside and out. Slowly and carefully lower the turkey into the hot oil using the lifting hook, avoiding splashing. Maintain a consistent temperature throughout the frying process, adjusting as needed. Fry time depends on the turkey’s weight; refer to the guidelines for accurate timing.
Setting Up the Fryer Location (Outdoor Use Only)
Crucially, the Masterbuilt turkey fryer is designed for outdoor use only. Select a flat, stable, non-combustible surface, like a concrete patio or driveway, far from buildings, decks, and overhanging structures. Maintain a minimum clearance of at least 10 feet in all directions.
Ensure the ground is level to prevent the fryer from tipping. Avoid grassy areas or wooden surfaces. Never operate the fryer in a garage, carport, or enclosed space. Keep children and pets away from the frying area. Be mindful of wind conditions, as it can affect oil temperature and splatter. A calm day is ideal for safe operation.
Adding Oil & Determining Correct Level
Before heating, carefully pour the appropriate cooking oil – peanut, canola, or vegetable – into the fryer pot. Do not use olive oil. Determining the correct oil level is vital to prevent overflow during frying. Utilize the displacement method: place the fully thawed turkey into the empty fryer basket and lower it into the pot.
Fill with water until the turkey is submerged, then remove the turkey and mark the water level. This indicates the required oil level. Dry the pot thoroughly before adding oil. Never fill the pot completely; leave several inches of headspace. Remember, a 20lb turkey requires a significant amount of oil, and displacement varies.
Marinating & Seasoning Your Turkey
Enhance your turkey’s flavor profile through marination and seasoning! A flavorful brine or marinade, applied 12-24 hours beforehand, ensures a moist and tender result. Pat the turkey completely dry, inside and out, with paper towels before seasoning. This promotes crispy skin during frying.
Season generously with your preferred blend of herbs, spices, and seasonings. Consider a dry rub, incorporating paprika, garlic powder, onion powder, and pepper. Ensure the seasoning penetrates both the skin and the cavity. Thoroughly dry the inside cavities using paper towels, as suggested in operation manuals. Remember, a well-seasoned turkey elevates the entire frying experience!
Lowering & Raising the Turkey Safely
Prioritize safety when lowering and raising the turkey! Ensure the lifting hook is securely attached to both the turkey and the fryer’s lifting mechanism. Slowly and steadily lower the turkey into the hot oil, maintaining a controlled descent to prevent splashing. Avoid sudden movements that could cause oil spillage.
Monitor closely during the entire frying process. When it’s time to remove the turkey, raise it slowly and carefully, again avoiding any abrupt motions. Use heat-resistant gloves for protection. Remember, the oil and turkey will be extremely hot! Proper technique minimizes risks and ensures a safe, successful fry. Refer to instructional videos for visual guidance.
Monitoring & Maintaining Temperature
Consistent temperature control is crucial for perfectly cooked and safe turkey. Utilize the built-in thermometer to continuously monitor the oil’s temperature throughout the frying process. Aim for a consistent 325°F (163°C), adjusting the temperature settings as needed to maintain this level.
Be prepared for slight fluctuations; minor adjustments are normal. However, significant temperature swings require immediate attention. Refer to the fry time guidelines based on the turkey’s weight – these are estimates, and internal temperature is the ultimate indicator of doneness. Regular monitoring ensures even cooking and prevents undercooked or overcooked results, guaranteeing a delicious outcome.
Using the Built-in Thermometer
The integrated thermometer is your primary tool for maintaining the ideal frying temperature of 325°F (163°C). Ensure the thermometer probe is fully submerged in the oil, but not touching the fryer’s heating element or the turkey itself. Regularly check the temperature display, noting any deviations from the target range.
Allow sufficient time for the thermometer to stabilize after adjustments to the temperature settings. Understand that slight temperature fluctuations are normal, but consistent monitoring is key. Accurate readings guarantee safe and evenly cooked results. Familiarize yourself with the thermometer’s response time for precise temperature control throughout the entire frying process.
Adjusting Temperature Settings
Your Masterbuilt turkey fryer features intuitive temperature controls. To adjust, use the control panel to increase or decrease the set temperature in small increments. Avoid drastic changes, as this can cause oil temperature instability. Monitor the built-in thermometer closely after each adjustment, allowing time for the oil to reach the new setpoint.
Remember, maintaining a consistent 325°F (163°C) is crucial for optimal frying. If the temperature drops significantly during turkey submersion, cautiously increase the setting. Conversely, if it rises too high, reduce the heat. Consistent observation and minor adjustments are key to achieving perfectly fried results. Refer to the manual for specific control panel instructions.

Fry Time Guidelines (Based on Weight)
Calculating accurate fry times is essential for a safely cooked and delicious turkey. Generally, allow approximately 3-4 minutes of fry time per pound of turkey. However, this is a guideline, and several factors can influence the final cooking time. Always verify internal temperature with a meat thermometer inserted into the thickest part of the thigh.
For a 12-pound turkey, expect a fry time of 36-48 minutes. A 16-pound turkey will require roughly 48-64 minutes. Remember to account for oil temperature fluctuations and maintain a consistent 325°F (163°C); Never rely solely on time; internal temperature is the definitive indicator of doneness – 165°F (74°C) is recommended.
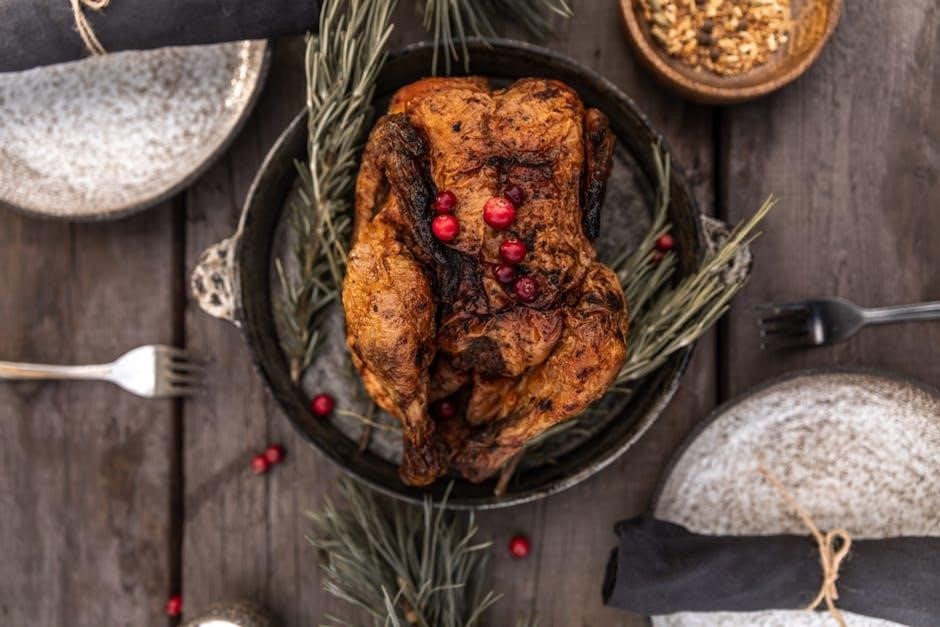
Post-Frying Procedures & Cleanup
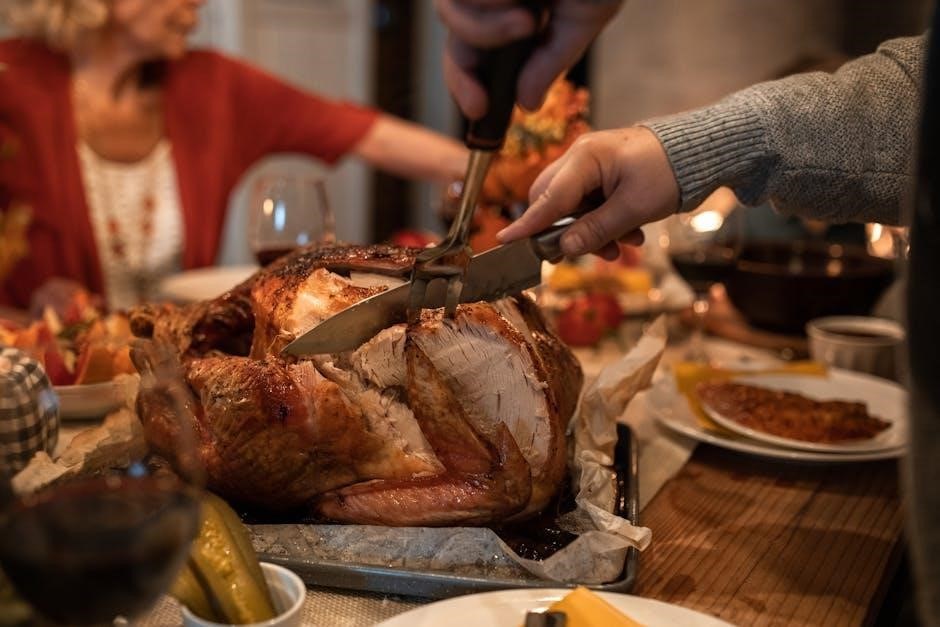
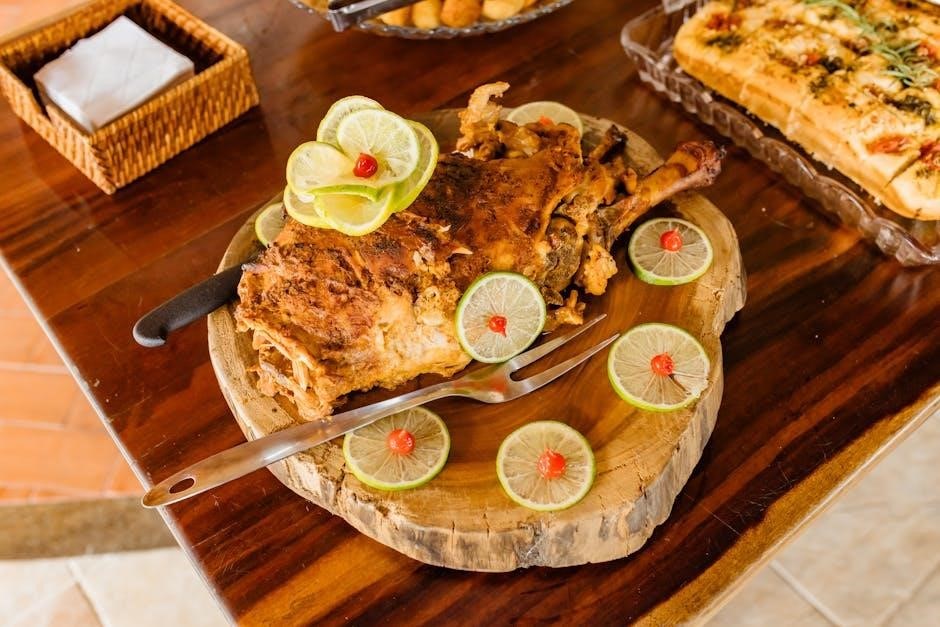
After safely removing your perfectly fried turkey, allow it to rest for at least 20-30 minutes before carving. This allows the juices to redistribute, resulting in a more tender and flavorful bird. Next, address the used frying oil – a crucial step for both safety and environmental responsibility.
Never pour used oil down the drain! Allow the oil to cool completely, then carefully strain it through a fine-mesh sieve or cheesecloth to remove any food particles. Store the cooled, strained oil in a sealed container for potential reuse (if appropriate) or for proper disposal at a designated recycling center. Thoroughly clean the fryer components with warm, soapy water after each use.
Safely Removing the Turkey
Exercise extreme caution when removing the turkey from the hot oil. Utilizing the fryer basket and lifting hook is paramount; ensure they are securely attached before initiating the lift. Slowly and steadily raise the turkey from the oil, allowing excess oil to drain back into the fryer. Avoid any sudden movements that could cause spills or splashes.
Once clear of the oil, carefully transfer the turkey to a large, heat-resistant platter or cutting board. Wear heat-resistant gloves throughout the process to protect your hands from burns. Remember, the turkey and the oil will remain extremely hot for a considerable time, so prioritize safety at every stage.
Cooling & Disposing of Used Oil
Allow the oil to cool completely before attempting disposal – this is crucial for safety and environmental responsibility. Cooling can take several hours, even overnight, depending on ambient temperature. Never pour hot oil down the drain, as it can cause severe plumbing issues and environmental damage.
Once cooled, carefully pour the used oil into a sealed, leak-proof container, such as the original oil container or a designated recycling jug. Contact your local waste management services for proper disposal guidelines; many communities offer oil recycling programs. Do not mix used oil with other waste materials.
Cleaning the Fryer Components
Always unplug the fryer and allow it to cool completely before beginning any cleaning procedures. Remove the frying basket and lifting hook, washing them with warm, soapy water. Avoid abrasive cleaners that could damage the non-stick coating. Rinse thoroughly and dry completely before storing.
Wipe down the exterior of the fryer with a damp cloth. For stubborn grease splatters, use a mild degreasing solution. Never immerse the fryer base in water or any other liquid. Ensure all components are completely dry before reassembling and storing the fryer. Proper cleaning extends the life of your Masterbuilt fryer.
Troubleshooting Common Issues
Fryer Not Heating: First, ensure the power cord is securely connected and the outlet is functioning. Check the thermostat setting; it may be turned too low. If the issue persists, consult a qualified technician – do not attempt self-repair.
Temperature Fluctuations: Minor fluctuations are normal, but significant swings indicate a potential problem. Ensure the fryer is placed on a level surface and shielded from wind. Avoid overcrowding the fryer, as this can affect oil temperature.
Oil Overflow Prevention: Always accurately calculate oil volume using the displacement method. Never fill the fryer beyond the designated maximum fill line. Ensure the turkey is completely thawed and dry before frying to minimize displacement.
Fryer Not Heating
If your Masterbuilt turkey fryer isn’t heating, begin with the simplest checks. Confirm the power cord is firmly plugged into a working electrical outlet. Test the outlet with another appliance to verify it’s receiving power. Next, inspect the control panel to ensure the unit is switched ‘on’ and the desired temperature is set.
Verify the thermostat is functioning correctly; a low setting will obviously prevent heating. If these steps don’t resolve the issue, there might be an internal component failure. Do not attempt to disassemble or repair the fryer yourself; this could be dangerous and void the warranty.
Contact Masterbuilt customer support or a qualified appliance technician for assistance. Providing the model number will expedite the troubleshooting process.
Temperature Fluctuations
Minor temperature fluctuations during frying are normal, especially when the turkey is initially lowered into the oil. However, significant or erratic temperature swings indicate a potential problem. Ensure the fryer is positioned on a level surface, away from drafts or direct sunlight, as external factors can impact temperature stability.
Verify the thermometer is correctly inserted and functioning. If using a separate thermometer, compare its reading to the built-in one. Overfilling the oil pot can also contribute to fluctuations; adhere strictly to the displacement method for accurate oil levels.
If fluctuations persist, the heating element or thermostat may be malfunctioning. Contact Masterbuilt support for guidance, avoiding any self-repair attempts.
Oil Overflow Prevention
Preventing oil overflow is paramount for safety. Accurately determining the correct oil level before heating is crucial; the displacement method, as outlined in the manual, is essential. Never exceed the maximum fill line indicated inside the pot. Thoroughly dry the turkey inside and out with paper towels before lowering it into the oil, as even small amounts of water cause violent bubbling and potential overflow.
Lower the turkey slowly and carefully using the lifting hook, avoiding sudden movements. Do not overcrowd the fryer; fry only one turkey at a time. Monitor the oil level closely during the initial stages of frying, and be prepared to adjust the temperature if necessary.